
Deploying an e-commerce site with Prestashop on Oracle Infrastructure
Introduction
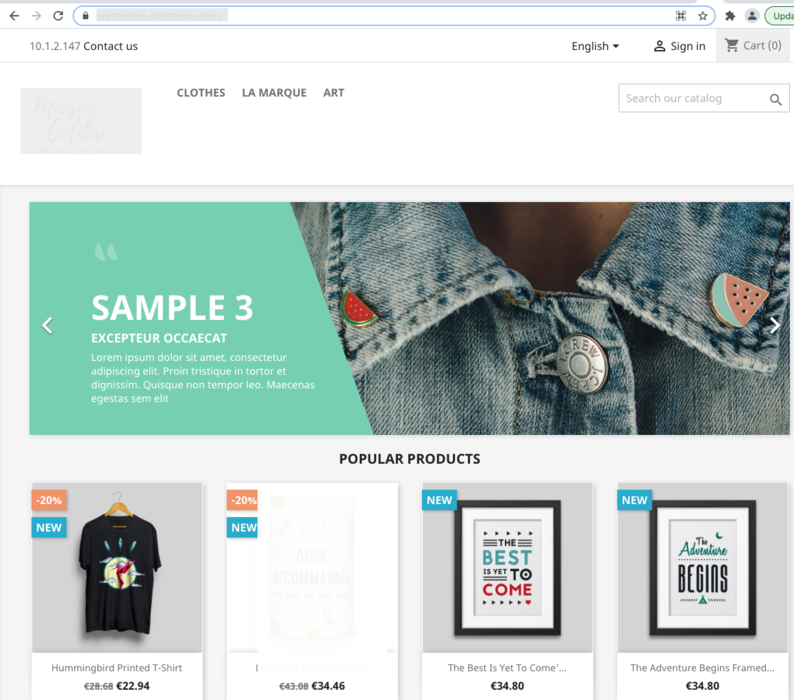
Oracle Infrastructure (OCI) can host many types of workloads, from very small applications to full enterprise, worldwide scale deployments. In this post I’ll show you an example of an e-commerce website hosted on OCI using the application PrestaShop.
If your business depends heavily on your web store, you’d want from the beginning to build a scalable, performant and highly available platform to run it, especially if you expect peak traffic:
Oracle Cloud Infrastructure (OCI) offers you all the tools required to help you achieve this, at a very reasonable and predictive cost: from flexible Load-Balancer, AutoScaling, MySQL cluster … and of course a very powerful Web Application Firewall (WAF) to protect your application from malicious and unwanted internet traffic. You also can integrate with Application Performance Management to provide deep visibility into the availability and performance of your website and the ability to diagnose issues quickly to deliver a consistent level of service and user experience.
In this post I will describe how you can achieve all this quite easily with OCI.
Update August 21
Using sql_require_primary_key was a bad idea as it is not supported with MySQL Clustering according to the MySQL Service HA prerequisites
High Availability uses MySQL Group Replication. This replication type requires that each table has a defined primary key.
I removed this part and used instead the create_invisible_pks option during the MySQL dump so it automatically creates invisible field and keys. Before using this option in Production, this should be first checked with Prestashop team to be sure it is a supported option.
Target Architecture
Here is the architecture we’ll deploy on OCI to provide a robust, scalable platform for our e-commerce website powered by PrestaShop.
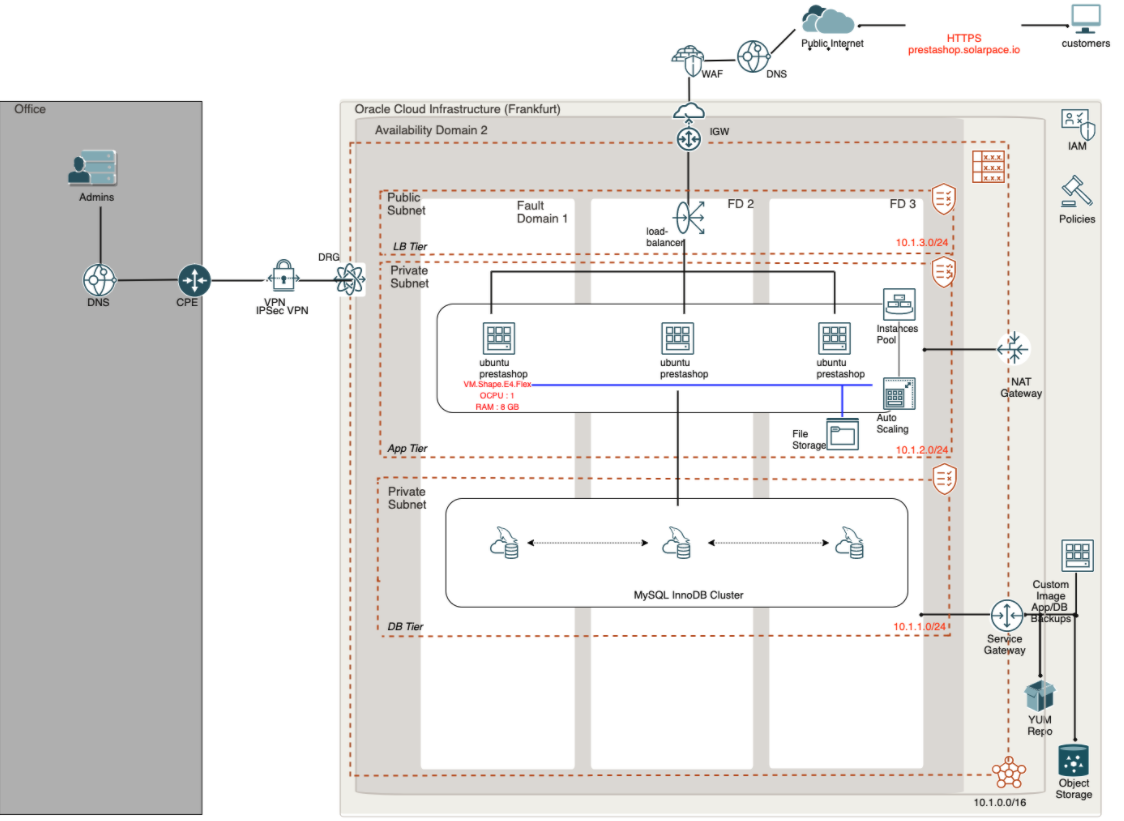
In this post I’ll only describe a single Availability Domain deployment but of course you can easily extend this to a multi Availability Domain deployment for a more secure and highly available platform.
Note : In this example, I expect my customers to be mostly from the same geographical area so I won’t implement any CDN.
This architecture involves the following OCI resources:
- VCN : virtual network including subnets, Internet Gateway, NAT Gateway security lists, route tables,
- Load-Balancer : a flexible Load-Balancer to provides automated traffic distribution to the multiple PrestaShop application servers - the instances pool automatically registers the new instances with the LB. We use Session Persistence so it can work with PrestaShop cookies,
- WAF : a Web Application Firewall to secure the website from malicious traffic and attacks; it also acts as SSL termination for our https://prestashop.solarpace.io URL,
- Compute : an OS image configured with our PrestaShop main site, an instance configuration, instances pool and auto-scaling based on CPU metrics,
- MySQL InnoDB cluster : 1 MySQL database in each fault domain which provides fault tolerance, zero data loss, automatic failover, and active update,
- Storage:
- Boot Volume for the compute instances
- File Storage to share specific PrestaShop folders, using NFS, across compute instances : images, caches and some configuration files
- Object Storage for the backups
Here is what it looks like in Oracle OCI Designer tookit : OKIT
Setup
1. check prerequisites for PrestaShop:
We’ll install PrestaShop 1.7, which requirements are:
- System: Unix, Linux or Windows.
- Web server: Apache Web Server 2.2 or any later version.
- PHP: We recommend PHP 7.1 or later. See the compatibility chart below for more details.
- MySQL: 5.6 minimum, a recent version is recommended.
See the official PrestaShop system requirements page.
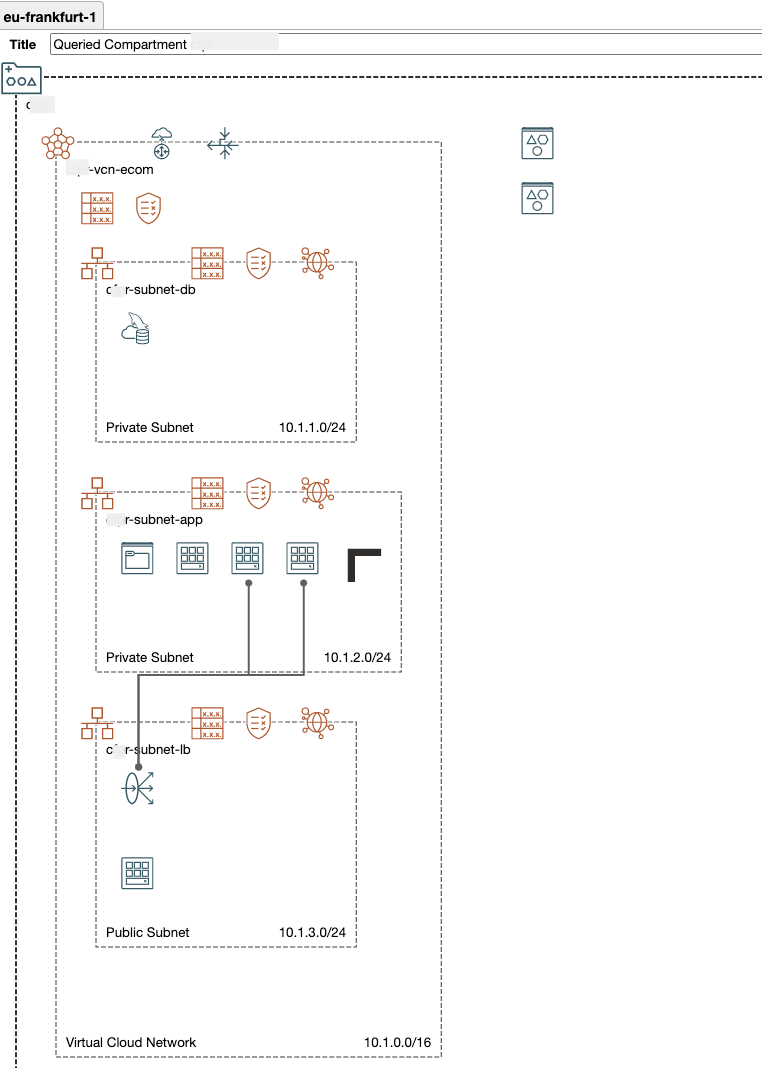
2. Create & configure your network resources
First we create a VCN :
| VCN Name | Compartment | CIDR Block | DNS Label |
|---|---|---|---|
| vcn-ecom | prestashop | 10.1.0.0/16 | vcnecom.oraclevcn.com |
And 3 Subnets:
| subnet | Access | CIDR Block | Comment |
|---|---|---|---|
| subnet-db | private | 10.1.1.0/24 | Database Subnet |
| subnet-app | private | 10.1.2.0/24 | Application Subnet |
| subnet-lb | public | 10.1.3.0/24 | Load-Balancer Subnet |
Each Subnet has its own security list:
seclist-db (for subnet subnet-db)
Security Rule Type Source or Destination Port Comments Ingress 10.1.2.0/24 22 SSH access (just for install) Ingress 10.1.2.0/24 3306 MySQL seclist-app (for subnet subnet-app)
Security Rule Type Source or Destination Port Comments Ingress 10.1.3.0/24 80 Load-Balancer HTTP access Ingress 10.1.2.0/24 111, 2048, 2049, 2050 NFS access (UDP & TCP) Ingress 10.1.3.0/24 22 SSH access (just for install) Egress 10.1.3.0/24 All seclist-lb (for subnet subnet-lb)
Security Rule Type Source or Destination Port Comments Ingress 0.0.0.0/0 80 Internet HTTP access Ingress 0.0.0.0/0 443 Internet HTTPS access Egress 0.0.0.0/0 All
Gateways:
| Gateway Name | Type | Services |
|---|---|---|
| igw | Internet Gateway | For inbound Internet traffic, to Bastion host only |
| ngw | NAT Gateway | For outbound traffic to Internet (e.g. SW updates) |
| sgw | Service Gateway | For all services In Oracle Services Network |
3. Create the Load-Balancer
Load-Balancer, lb-prestashop, will be configured with 1 Backend Set and 1 Listener on port 80.
During creation, choose:
- Details
- Visibility Type : Public
- Public IP : I used Ephemeral but for Production you would have reserved a Public IP and choose “Reserved IP Address”
- Shape : Flexible shape
- Min Bandwith : 10 Mbps
- Max Bandwith : 1000 Mbps
- VCN : vcn-ecom
- Subnet : subnet-lb
- Backend (backendset-prestashop):
- LB Policy : Weighted Round Robin
- Health Check Policy:
- Protocol : HTTP
- Port : 80
- URL Path : /
- Status Code : 200
- Listener (listener-prestashop)
- Traffic type : HTTP
- Port : 80
Upon creation, the Load-Balancer should be in Critical state, which is OK for now as we have not defined any backend servers yet.
4. Configure MySQL InnoDB Cluster
PrestaShop has some tables without any primary keys and this is a prerequisites for MySQL High-Availability clusters:
- you can check them with the following SQL :
SELECT tables.table_schema , tables.table_name , tables.engine
FROM information_schema.tables  LEFT JOIN (
   SELECT table_schema , table_name
   FROM information_schema.statistics
   GROUP BY table_schema, table_name, index_name
   HAVING SUM(
     case when non_unique = 0 and nullable != 'YES' then 1 else 0 end ) = count(*) ) puks
   ON tables.table_schema = puks.table_schema
  AND tables.table_name = puks.table_name
  WHERE puks.table_name IS null
  AND tables.table_type = 'BASE TABLE'
  AND tables.table_schema NOT IN ('performance_schema', 'mysql', 'sys', 'information_schema');
| TABLE_SCHEMA | TABLE_NAME | ENGINE |
|---|---|---|
| prestashoptest | ps_accessory | InnoDB |
| prestashoptest | ps_customer_message_sync_imap | InnoDB |
| prestashoptest | ps_eventbus_job | InnoDB |
| prestashoptest | ps_eventbus_type_sync | InnoDB |
| prestashoptest | ps_gsitemap_sitemap | InnoDB |
| prestashoptest | ps_linksmenutop_lang | InnoDB |
| prestashoptest | ps_order_detail_tax | InnoDB |
| prestashoptest | ps_order_invoice_tax | InnoDB |
| prestashoptest | ps_order_slip_detail_tax | InnoDB |
As a workaround we would first need to create a custom Mysql configuration and then create our database cluster.
I only changed the sql_require_primary_key setting as PrestaShop schema contains some tables without primary keys and the install would failed otherwise.
You may need to revisit the configuration variables and adjust to your environment, planned workload when needed.
Select Databases>MySQL>Configurations:
select the configuration MySQL.VM.Standard.E3.1.8GB.HAClick on Copy Configuration to create a custom configuration:Name : mysql-prestashop-configShape : MySQL.VM.Standard.E3.1.8GBVariables : create a new variable using sql_require_primary_key parameterset the value to : OFF
Update August 21 : using sql_require_primary_key is not supported with MySQL Clustering so you need to add primary keys to the Prestashop schema; in my configuration I added them when dumping an existing Prestashop database to an OCI bucket; I used the create_invisible_pks option when running the **util.dumpSchemas utility:
util.dumpSchemas(["prestashoptest"],"",{"osBucketName": "mysql-bucket-with-pks", "osNamespace": "<your namespace>", "ocimds": "true", "compatibility": ["strip_definers", "strip_restricted_grants","create_invisible_pks"]})
You can also manually create invisible columns and keys on the tables listed above :
ALTER TABLE table1 ADD my_inv_id BIGINT UNSIGNED NOT NULL AUTO_INCREMENT PRIMARY KEY INVISIBLE FIRST;
Now create your database from the DB Systems page:
- Name : mysql-ecom
- High availability
- Administrator Credentials : username/password
- VCN : vcn-ecom
- SubNet : subnet-db
- Availability Domain : AD1
- Hardware Shape: MySQL.VM.Standard.E3.1.8GB
- Data Storage Size : depending on your needs, I picked default 50 GB
- Enable backups
- Advanced Options:
~~ - Configuration : select the configuration you created before : mysql-prestashop-config~~
- keep the default configuration
- Management : you may want to pick a suitable maintenance window according to your activity
When your database is created, get its IP address : 10.1.1.xxx
Next you will need to create your application database & user with required privileges, respectively prestashoptest & prestashopuser. For this I created a temporary bastion host in subnet subnet-lb, a security rule to allow SSH traffic from its IP address and opened a terminal connection to the DB server to run the following commands:
create database prestashoptest;

create user prestashopuser@localhost identified by 'xxxxx';
create user prestashopuser@'%' identified by 'xxxxx';

grant all privileges on prestashoptest.* TO prestashopuser@localhost;
grant all privileges on prestashoptest.* TO prestashopuser@'%';
5. Create your File Storage
After the Prestashop install we’ll move all files that need to be shared among all compute instances in a NFS file-system using the File Storage service. From Storage>File Storage menu, create:
- a file-sytem fs-prestashop
- an export path fs-prestashop
- NFS export options:
- Source : 0.0.0.0/0
- Ports : any
- Access : Read/Write
- a Mount Target mounttarget-prestashop in VCN vcn-ecom, subnet subnet-app
Take note of the Mount Commands:
sudo yum install nfs-utils
# For Ubuntu :
sudo apt install nfs-commons
sudo mkdir -p /mnt/fs-prestashop
sudo mount 10.1.2.7:/fs-prestashop /mntfs-prestashop
6. Create your Gold instance image with PrestaShop
This is as step where we’ll spend more time as it involves multiple sub-tasks.
First, create a new Compute instance with the following specs:
- Image : Canonical Ubuntu 20.04
- Processor : AMD VM.Standard.E4.Flex 1 OCPU
- Memory : 8 GB RAM
- Subnet : subnet-app
Connect using a Bastion Service or a temporary Bastion Host
Run the following commands to install all requirements - for this I used this very well documented site : How to install PrestaShop on Ubuntu 20.04 Server
sudo apt-get update
sudo apt-get upgrade
sudo apt-get install vim
sudo apt install apache2 libapache2-mod-php mysql-server
sudo apt install php7.0-mbstring php7.0-zip php-xml libz-dev php-gd php-il
sudo a2enmod rewrite
sudo apt-get install unzip
Update php.ini file settings according the documentation, especially:
- memory_limit
- upload_max_filesize
Check you iptables rules to allow Inbound access to port 80.
Download, install and configure Prestashop following the documentation : Installing PrestaShop. The auto-installer makes it very easy
curl https://download.prestashop.com/download/releases/prestashop_1.7.7.4.zip
sudo unzip prestashop_1.7.7.4.zip -d /var/www/html/prestashop/
Notes :
before you can start the auto-installer, you need to register your instance in the backendset of the load-balancer. Then start the install using the LB IP : http://xxx.xxx.xxx.xxx/prestasthop
Use your MySQL database and credentials during the install.
there is one issue I got during the install : the install script tests the creation of the database using MyISAM which is not not activated in our database; I had to make the following changes in the classes/db/DbPDO.php file: replace MyISAM with InnoDB:
public static function checkCreatePrivilege($server, $user, $pwd, $db, $prefix, $engine = null)
{
    try {
        $link = DbPDO::getPDO($server, $user, $pwd, $db, 5);
    } catch (PDOException $e) {
        return false;
    }

    if ($engine === null) {
//      $engine = 'MyISAM';
      $engine = 'InnoDB';
    }
At the end, if everything went well you should now have a PrestaShop website ready.
Last step before creating our Gold image, mount the NFS file storage and move some folders in it so it can be shared among all instances:
sudo apt install nfs-commons
sudo mount 10.1.2.7:/fs-prestashop /mnt/fs-prestashop

cd /var/www/html/prestashop
mv /var/www/html/prestashop/theme /mnt/cfpr-fs-prestashop/
mv /var/www/html/prestashop/img /mnt/cfpr-fs-prestashop/
mv /var/www/html/prestashop/cache /mnt/cfpr-fs-prestashop/
mkdir /mnt/cfpr-fs-prestashop/app/
sudo ln -s /mnt/cfpr-fs-prestashop/app/config /var/www/html/prestashop/app/config

sudo ln -s /mnt/cfpr-fs-prestashop/theme /var/www/html/prestashop/theme
sudo ln -s /mnt/cfpr-fs-prestashop/img /var/www/html/prestashop/img
sudo ln -s /mnt/cfpr-fs-prestashop/cache /var/www/html/prestashop/cache
sudo ln -s /mnt/cfpr-fs-prestashop/app/config /var/www/html/prestashop/app/config
Update also the /etc/fstab file to mount the file storage at boot time:
# Prestashop Shared FS
10.1.2.7:/fs-prestashop /mnt/fs-prestashop nfs nfsvers=3 0 0
Reboot the instance and test again PrestaShop to make sure everything works properly.
Notes :
we could have moved the whole prestashop folder in the file storage but it would impact performances I guess
there may be other folders that need to be shared and there may be a way to store the product images in Object Storage but I haven’t looked into it yet
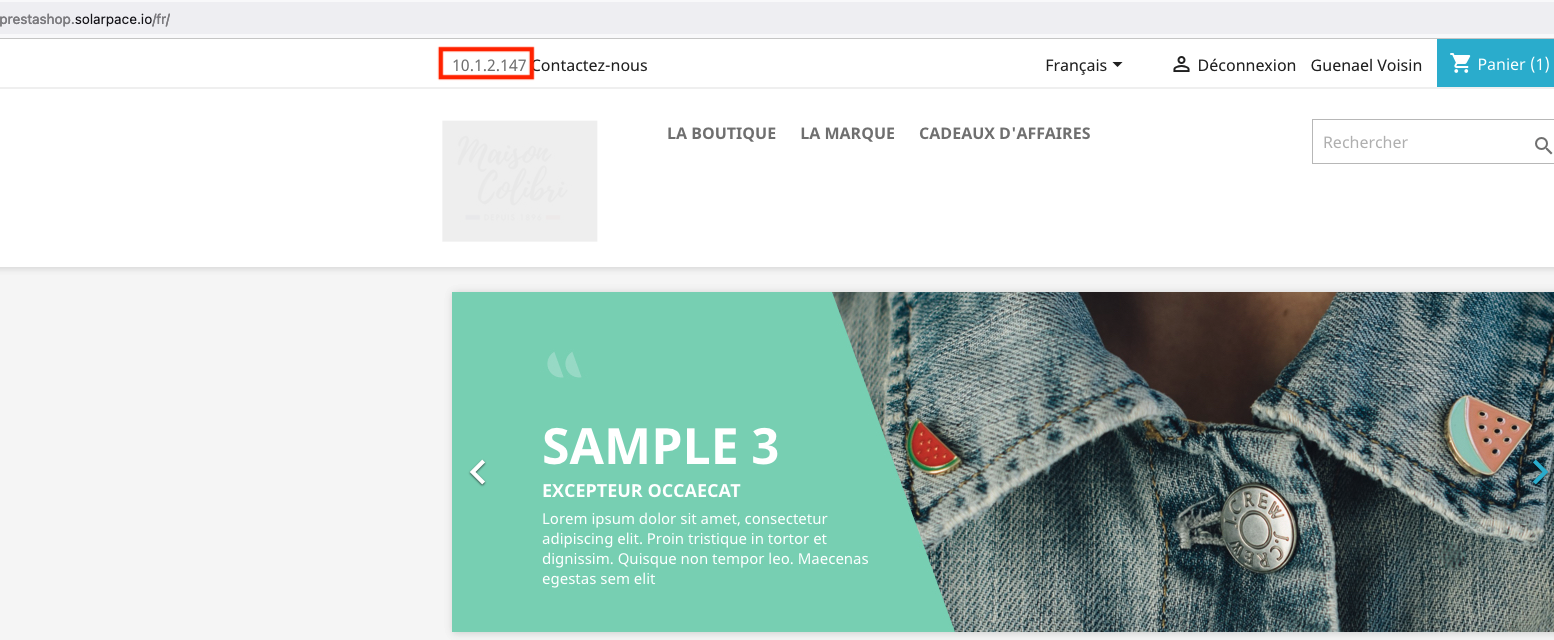
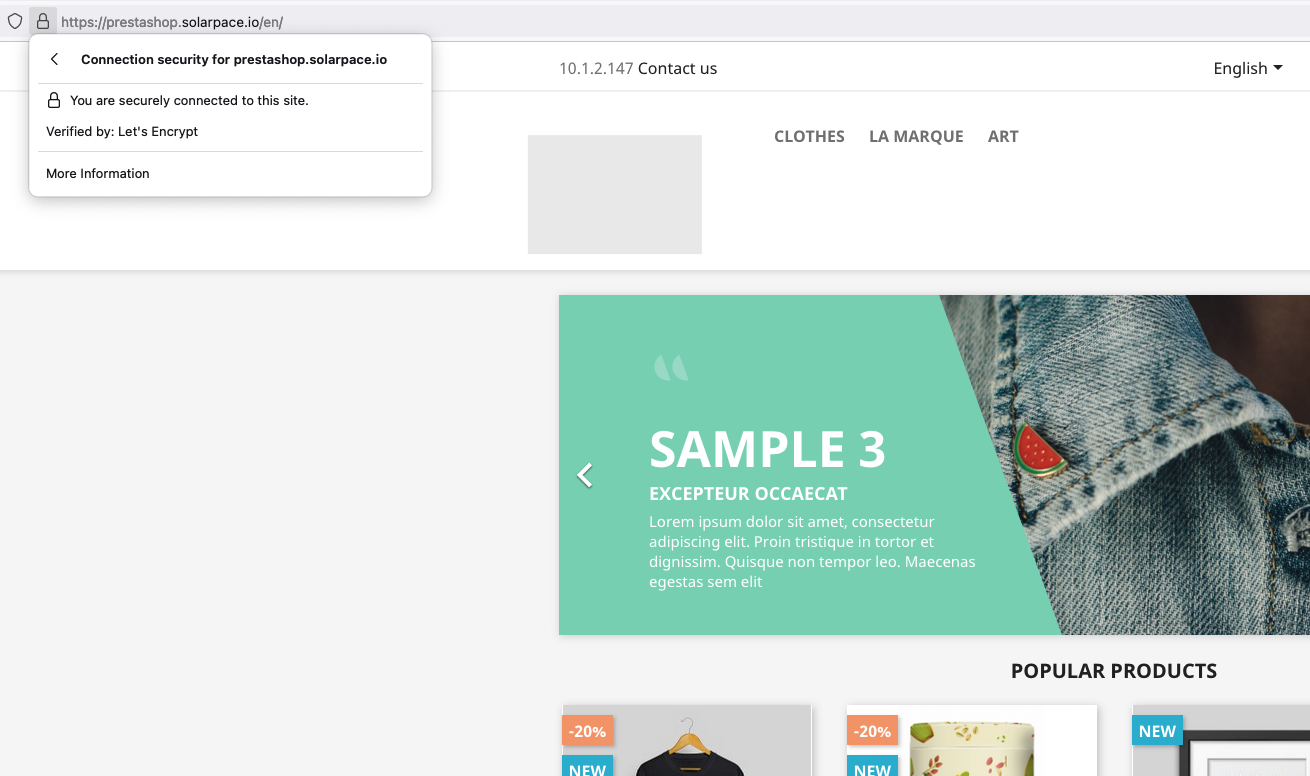
to test if the load-balancer and autoscaling work fine, I also updated a Prestashop file (themes/classic/modules/ps_contactinfo/nav.tpl) so it can display the instance IP on the web page:
<div id="_desktop_contact_link">
  <div id="contact-link">

    {$smarty.server.SERVER_ADDR}

    {if $contact_infos.phone}
Now that you have your PrestaShop instance ready, we can create the Custom Image, custimage-prestashop
7. Create your instances auto-scaling pool
Steps to configure an auto-scaling pools are:
- create a compute instance from the Custom Image custimage-prestashop (this is just a temporary instance)
- from the instance, create an Instance Configuration : click More Actions>Create Instance Configuration : instconfig-prestashop
- create the instance pool instpool-prestashop
- Number of instances : 3
- Placement:
- AD : same as the MySQL Cluster
- subnet : subnet-app
- Fault domains : leave empty so it distributes automatically across all 3 FDs.
- Attach a Load-Balancer:
- name : lb-prestashop
- backend set : backendset-prestashop
- port : 80
- create an auto-scaling configuration : autoscalingconfig-prestashop
- instance pool : instpool-prestashop
- AutoScaling Policy:
- name : autoscalingpolicy-prestashop
- Cooldown period : 300 seconds
- Perf Metric : CPU utilization
- Scale-out rule : Greater than 80%
- Scale-in rule : Less than 50%
- Scaling limits :
- Min : 1
- Max : 5
- Initial : 1
You should now have a prestashop website displaying a different server IP address next to the Contact Us header text (use 2 web browsers so you don’t have the same session cookie and connect to 2 different backend servers):
8. Create and configure the WAF
Right now we have a scalable, performant and highly available platform to run our web store but it’s not very secure : we use HTTP and not HTTPS and there is no Web Application Firewall to protect us from attacks. With OCI we can very easily and quickly remediate this.
Go to Identity & Security>Web Application Firewall:
First generate an SSL certificate using Let’s Encrypt for example; I created mine (certificate-prestastop.solarpace.io) for the domain prestastop.solarpace.io
- there are many doc on Internet to help you create tour certificate; in my case, I created a temporary listener on the load-balancer for port 443 and used certbot on my Ubuntu instance:
snap install --classic certbot
sudo ln -s /snap/bin/certbot /usr/bin/certbot
sudo certbot certonly --apache
Once you have your certificate ready, create a new certificate, certificate-prestashop.solarpace.io, by uploading the SSL certificate and its private key.
Create a WAF policy:
- Name : waf-prestashop
- Domain : prestashop.solarpace.io
- WAF Origin :
- Name : cfpr-waforigin-prestashop
- URI : LB IP Address
- HTTPS Support Enabled : Yes
- Point to the certificate you uploaded in step 1
- Activate the Protection Rules (from the long list of pre-defined rules) and Access Controls based on your requirements; for example:
- Cross-Site Scripting (XSS) Attempt: XSS Filters from Internet Explorer
- Cross-Site Scripting (XSS) Attempt: HTML Tag Handler
- Cross-Site Scripting (XSS) Attempt: SS Attack Detected via libinjection
- …
Finally, visit your DNS provider and add your CNAME created for your WAF policy (something like prestashop-solarpace-io.xxx.xxxwaas.oci.oraclecloud.net to your domain’s DNS configuration for prestashop.solarpace.io
Click Publish Changes
Activation will take up to 30 minutes and from there on your should be able to access your webstore using your domain URL and HTTPS.
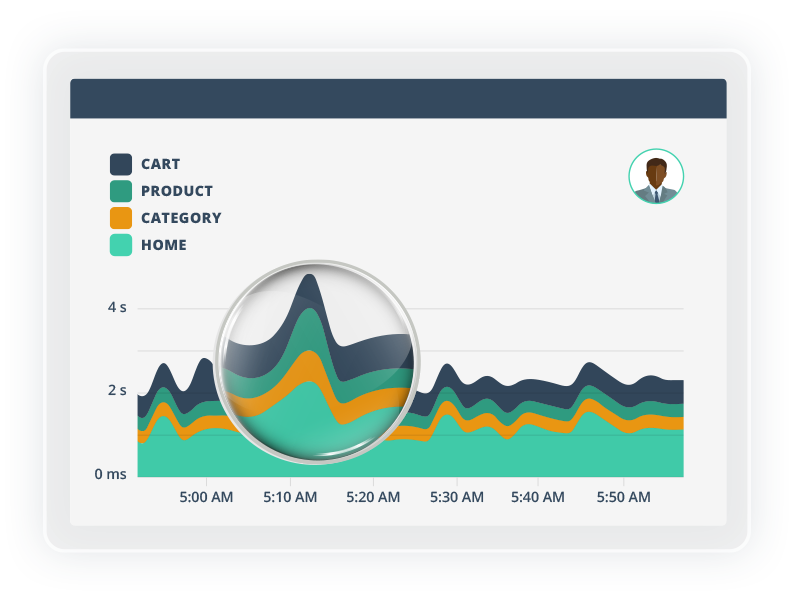
Monitoring with APM
OCI has very powerful services for monitoring infrastructure, applications, databases - the whole stack defining your application.
I already wrote a post about this and how it can be used for JD Edwards : Monitor your JD Edwards platform with the new Oracle APM
I thought initially I could include the configuration for our webshop in this post but it is quite a very long post already so I’ll create a dedicated post soon for this.
I hope this post could be useful and help you better understand all the OCI technologies I used to build this PrestaShop web store.