
JD Edwards AIS Authentication with Keycloak IAM
You have configured your AIS Server with https, created orchestrations as “micro-services” ready to be consumed by your mobile application, Oracle JET application, … and you are now wondering about authentication ?
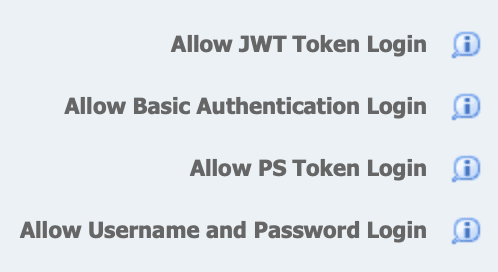
With the latest Tools releases you now have multiple options for this:
Basic authentication, username/password and PS Token authentication are fairly easy to use and I won’t talk about it in this post. You can check directly the Oracle doc : https://docs.oracle.com/cd/E53430_01/EOTRS/Authentication.html
If you need direct authentication with your AD, things could get more complex; I recently had this requirement to use an external IAM (Identity & Access Management). The customer was in the process of implementing Keycloak, an open source IAM solution (for more information see https://www.keycloak.org) and they wanted to know how they could also use it for this new Oracle JET internet-facing application.
The Oracle documentation describes a little bit how to implement it but it’s quite a journey ! See the full Oracle documentation here : https://docs.oracle.com/cd/E53430_01/EOTSC/setup_jde_e1_sso.htm#EOTSC1095
I’ll describe in this post my findings and methodology to implement JWT authentication for AIS.
The diagram illustrating this post summarizes the authentication flow when you want to implement an external authentication using JWT token; it involves 4 main steps to manage in your application:
Redirect Login page to Keycloak authentication page so the users could enter their username / password (or you can use your own login page and only send the required information to Keycloak)
Retrieve the JWT Token generated by Keycloak
Send a token request to the AIS Server with the JWT Token in the Authorization header:
- the AIS Server passes the JWT Token to the backend HTML server
- the HTML Server validates the JWT Token with the Keycloak public key and passes it to the Security Server
- The Security server validates the Trusted node (configured in the HTML Server instance)
- the HTML server validates the authorization and pass back the AIS Token
The application then receive the AIS Token and all user informations; from now on, you should only use this AIS token in the jde-ais-Auth header when you call a REST API or an Orchestration
Quite easy, isn’t ?
It took me a while to understand all the configuration required and validate my first authentication request from the Oracle JET application …
I also thought the JWT Token would be enough to authenticate all my AIS API calls **but it can only be used to retrieve the AIS token and **_then _you have to switch to the AIS token for all follow-up API calls.
I’ll describe in details the steps involved, mainly as a memo for me but this could maybe help others with the same requirement:
1. Keycloak configuration
As this initially was only a Proof Of Concept exercise I couldn’t use the customer Keycloak instance so I had to install and configure my own.
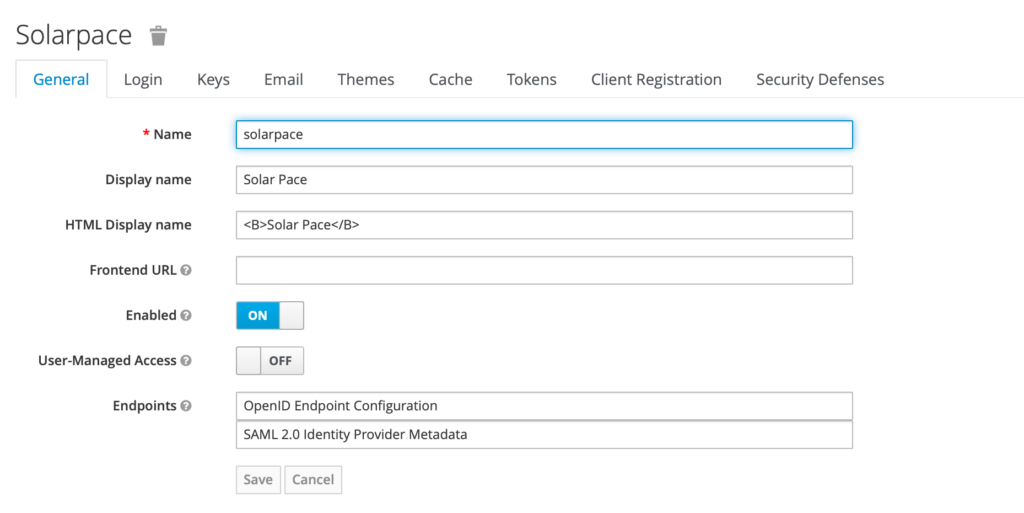
To keep it simple I used a Docker container running on 1 of the 2 Oracle free Linux instances provided with Oracle Always Free Cloud Services to quickly deploy a Keycloak instance at https://auth.solarpace.io
I then :
- created a realm solarpace
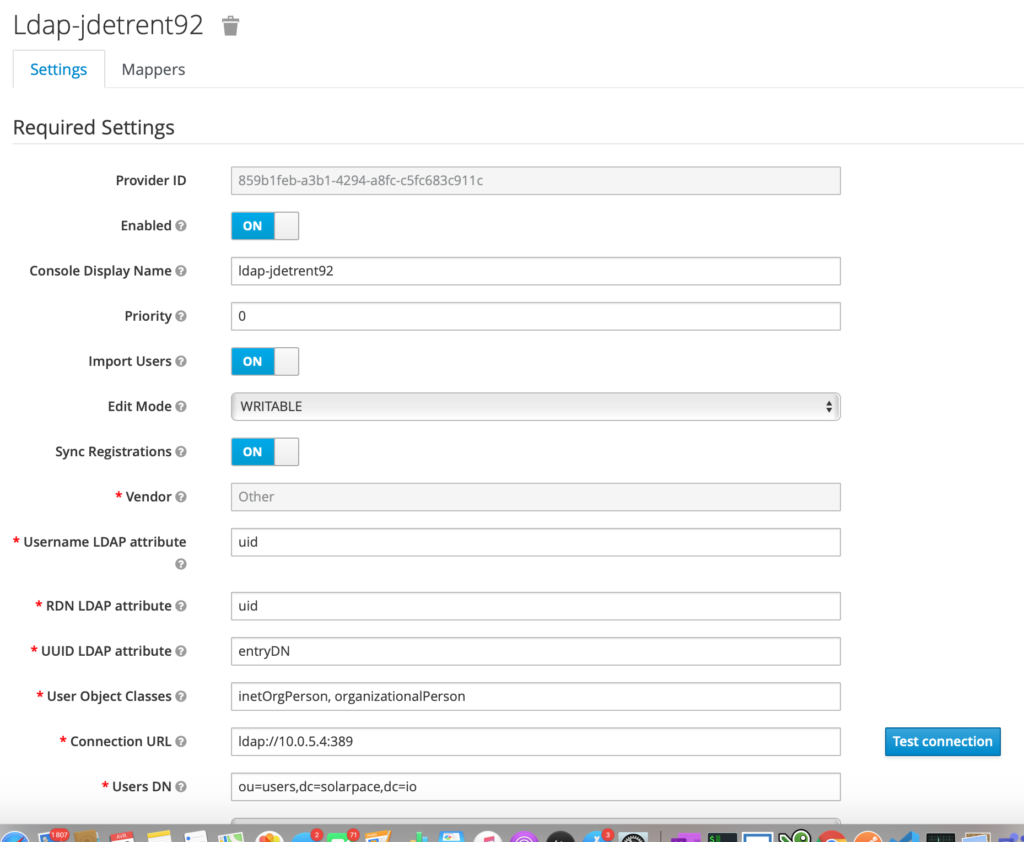
- configured User Federation to synchronize the users from an existing LDAP (OpenLDAP)
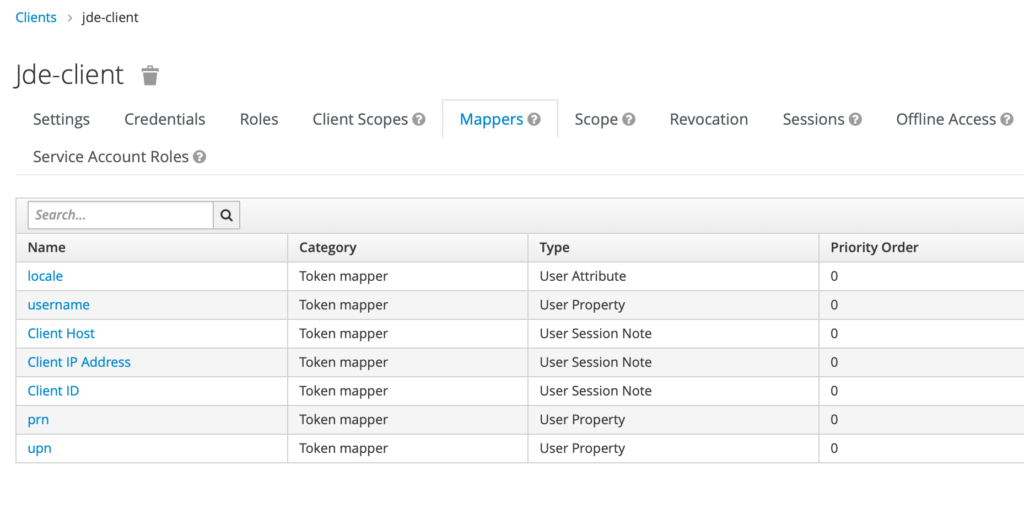
- and a client jde-client
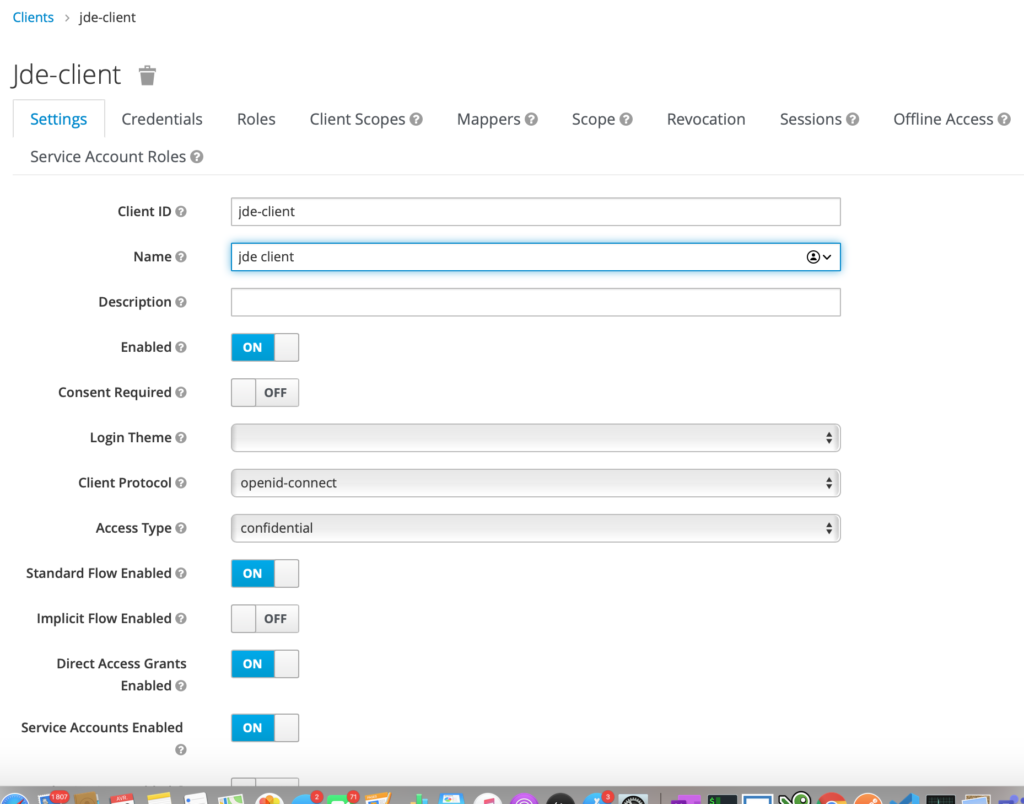
Make sure you define the correct Mappers, especially:
- username => username
- prn => username
- upn => username
This is the part where I struggled the most.
2. Certificate Keystore
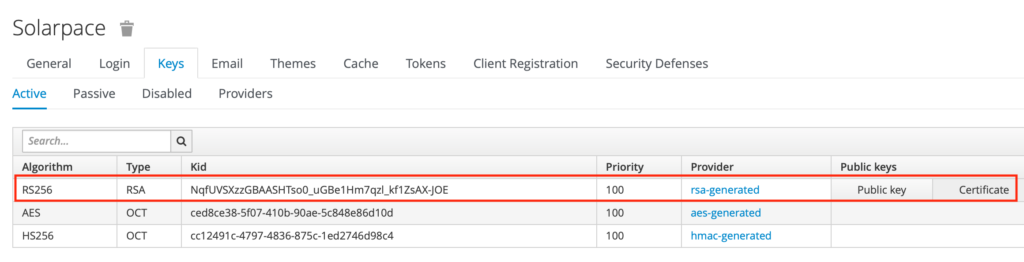
Once you have a Keystore instance configured you must provide Keycloak public key to the HTML instance so they can talk together:
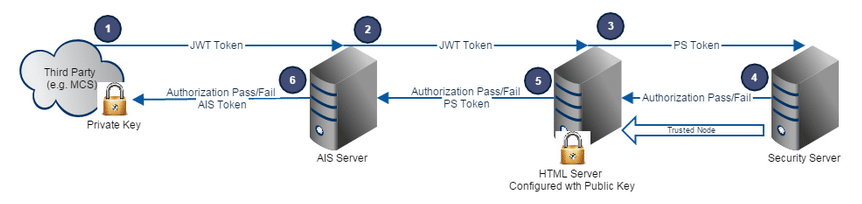
Image provided by Oracle
- Retrieve the public key certificate from Keycloak Admin UI : Real Settings –> Keys –>rsa-genereated –> Certificate; download the file and transfer it to your HTML server
2. extract the certificate (text starting with —–BEGIN CERTIFICATE—– and ending with —–END CERTIFICATE—–) in a kc-sp-certificate.pem file
3. create the kcs12 keystore on the HTML Server (Oracle Linux server here); give it a password during creation:
/u01/java/1.8.0_162_64bit/jdk/bin/keytool -storetype PKCS12 -import -alias kc-solarpace -file kc-sp-certifcate.pem -keystore spkeystore.p12
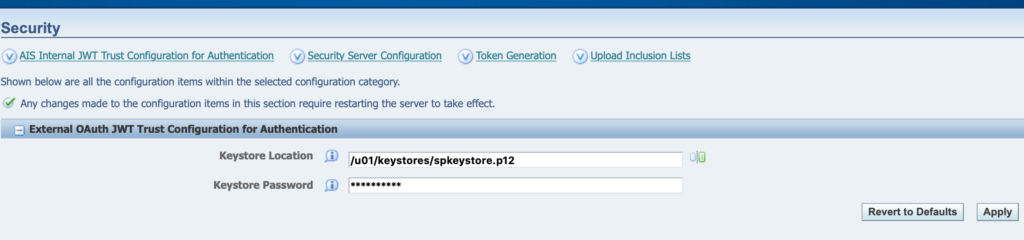
4. configure the Keystore options in the HTML instance :
In Server Manager, select theSecurity configuration for the HTML Serverp12 file name and password.
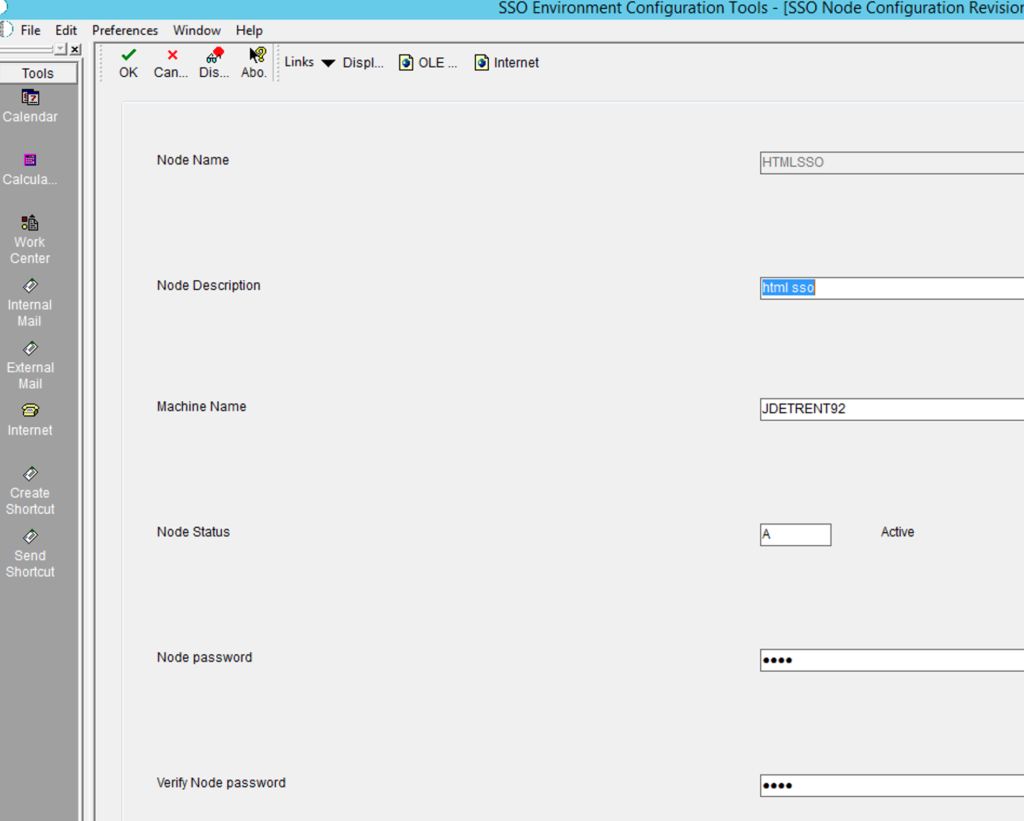
3. JD Edwards SSO Trusted Nodes
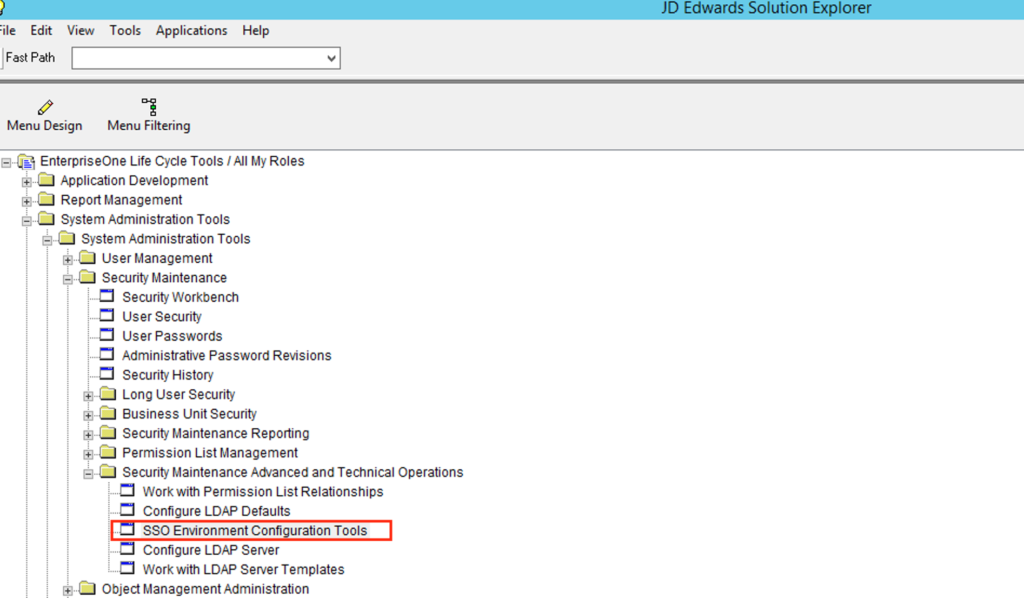
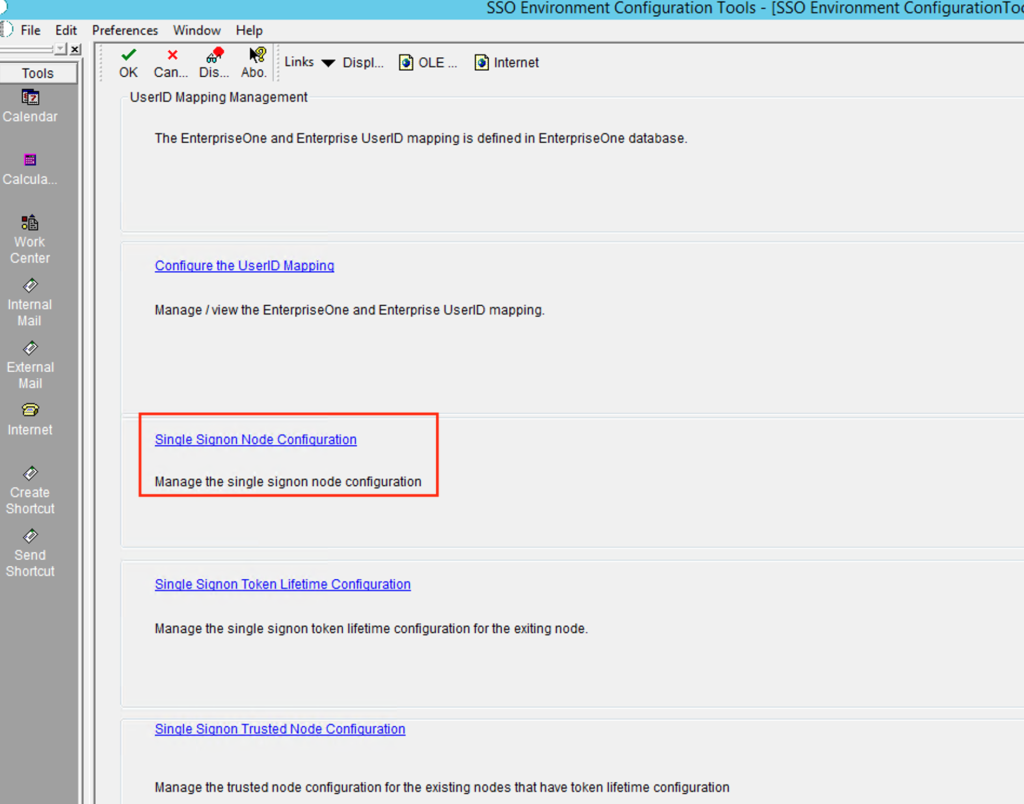
Finally you must configure the Enterprise Server to trust the HTML Server: using a FAT Client select menu option “System Admin. Tools => Security Maintenance => Adv. & Technical Op => SSO Environment Configuration Tools”, then “Single Signor Node Configuration”.
Create a new Node configuration for your HTML server and assign a password:

2. in Server Manager, configure the SSO Token and password accordingly and then restart the Enterprise and Server instances

4.Test your configuration
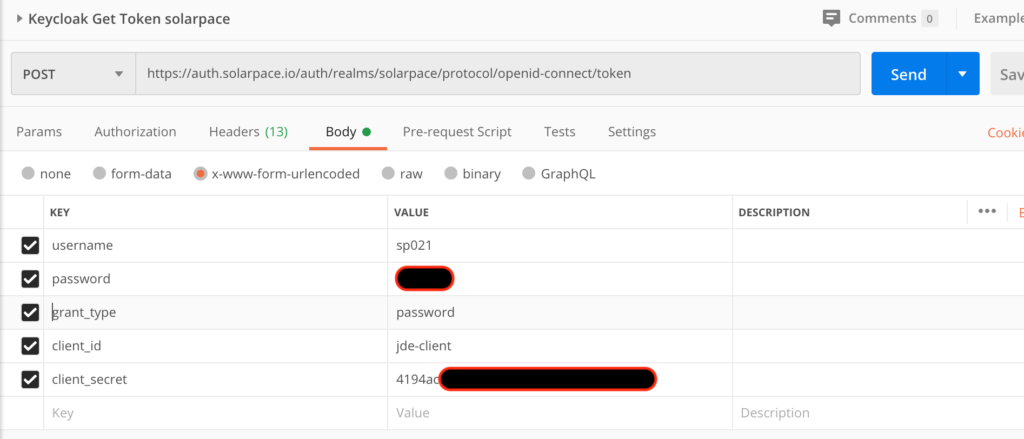
We are now ready to give it a try, manually at first using Postman:
- Request a Token to Keycloak using the URL https://auth.solarpace.io/auth/realms/solarpace/protocol/openid-connect/token in Postman; you would need the client_secret created in KeyCloak:
- Content-Type = application/x-www-form-urlencoded
- username : <connect with a LDAP user also defined as JDE user>
- password: xxxxx
- grant_type : password
- client_id : jde-client
- client_secret : xxxxxxxxxx
The response should be a json file with the following fields: acess_token , expires_in, refresh_expires_in, refresh_token, token-type : Bearer, not-before-policy, session-state, scope: “profile email” .
Now the final test : copy the access_token and call the AIS Token Request URL <http:///jderest/v2/tokenrequest> to authenticate with JD Edwards; select “Bearer Token” Authorization with the access_token:
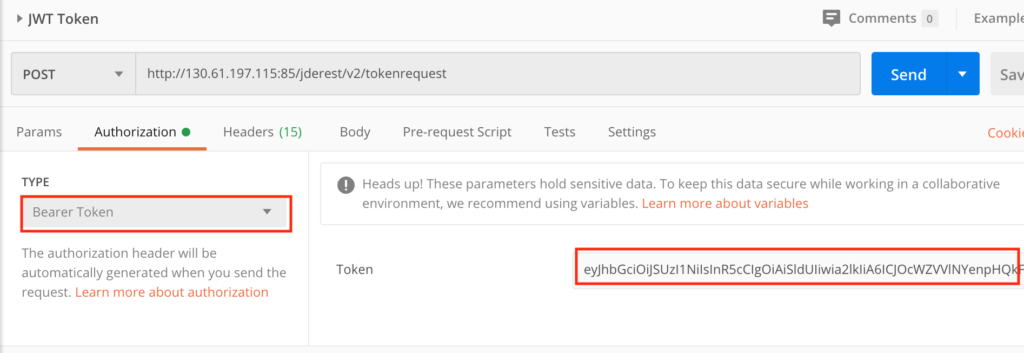
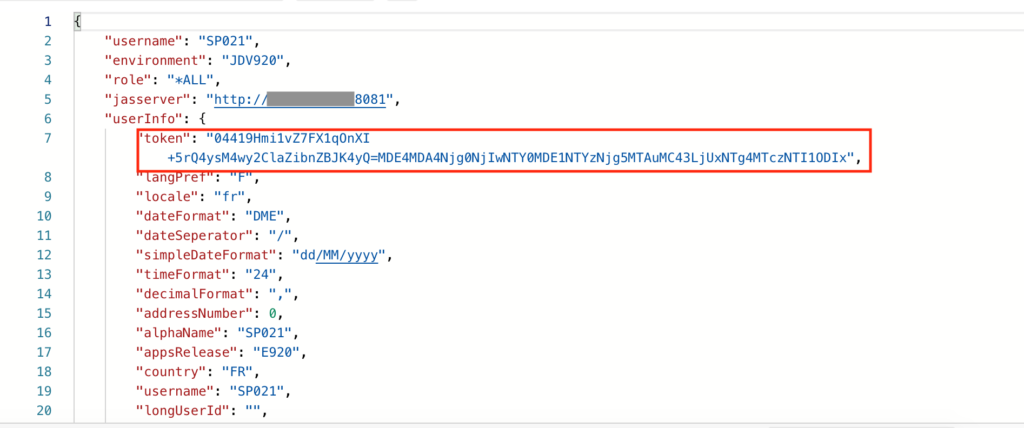
If your configuration is correct, you should be authenticated and receive the token info response including the AIS Token:
If you have an error with “incorrect header”, make sure you have the Header ‘content-type’ = ‘application/json’.
Once you have the AIS Token you can reuse it in the following AIS REST calls or Orchestrations calls !
Conclusion
In this post, we configured a Keycloak instance acting as our IAM (Identity and Access Management) system and used it to authenticate with our JD Edwards AIS server.
Now that you have this configuration up and running, you can include the authentication in your Web application, let’s say an Oracle JET Mobile application.
Feel free to contact me if you have any issue while configuring it for your environment.